18 October 2012

Spiced Pumpkin Jam


Pumpkin is often associated with halloween and closely related with this celebration. There are a large amount of recipes with pumpkin and other alternatives such as this jam. What is better than to make your own homemade jam? 

I really love anything with pumpkin, sweet or savory. Here I did my own spiced pumpkin jam which is absolutely amazing, very tasty and with a special flavour. It is not extremly sweet. You can eat it with pancakes, just spread it on a slice of bread but what I really like to use it is as a condiment with some grilled meat, and to spread on toast with foie or cheese.

As all jams it is very easy to make, you will just have to add the wished species. Here you have my recipe but you can add other species such as nutmeg, black peper or cumin. The smell during the cooking is really nice.


INGREDIENTS makes about 3 jars of 200 ml

500 g pumking (peeled and cubed)
200 g gelatin sugar (regular sugar also avaliable)
1/2 lemon juice
1/2 teaspoon cinnamon
1 teaspoon ginger
2 cloves

Put all the ingredients in a big sauce pan and cook covered on a low heat, until the pumpkin gets soft, and the mixture thinkens and you have got the right consistency. Aproximately 40 minutes. Stir from time to time with a wooden spoon during the cooking process. 

If during the process it gets too thick you just must add some water in.

Liquify the mixture with a blender, if you wish do not do it competly and leave it a little bit chunky. 

Pour the hot jam into sterilised jars, close immediatlely and place the jars upside down, during 12 hours or overnight.

To sterelize the jars put them into boiling water.


I love this pumpkin color! 


15 October 2012

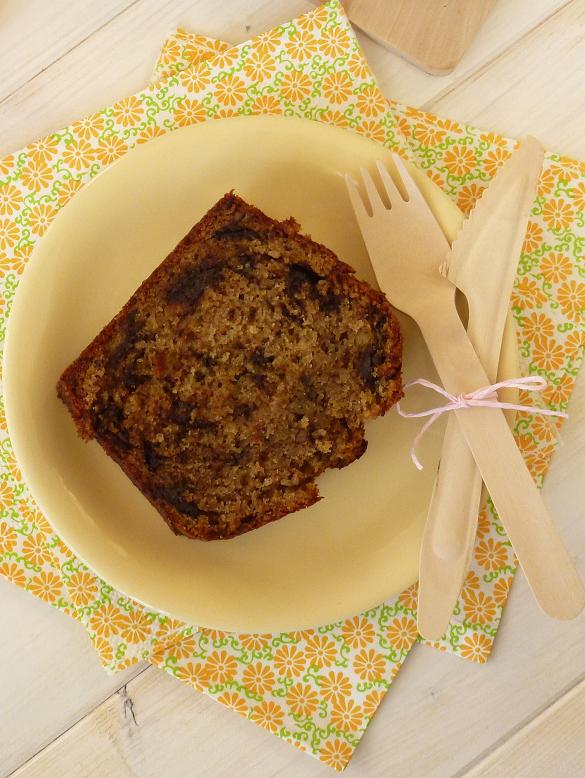
Chocolate and Banana Loaf


Days are getting colder and that means is good for my baking. The oven is working hard since a few weeks. Last few days I was thinking about a chocolate and banana loaf. And last week I took the advantage of having some ripe bananas in the kitchen to make it. Is really good all these kind of recipes with banana, need very riped ones. Otherwise I think I would not eat them.

Chocolate and banana combination never fails, in cakes, icecreams and anything else you do with those two, the taste is lovely, well if you like both of them of course! 

A slice of this loaf is perfect for a breakfast or an afternoon tea, and if you eat right after the baking, when is still a little bit warm the taste sensation is even better, delicious!


INGREDIENTS makes a 22cm loaf tin

125 g unsalted butter, at room temperature
250 g golden caster sugar
3 large eggs
250 g plain flour
1 tsp vanilla extract
2 tsp baking powder
1 tsp bicarbonate of soda
a pinch of salt
1/2 cup buttermilk (118 ml)
4 tipe bananas, mashed with a fork
175 g dark chocolate broken into small pieces or chocolate chips
75 g pecan nuts (or walnuts)

Preheat the oven to 180º and grease the loaf tin.

Sift the flour, baking powder, salt and bicarbonate in a bowl, set aside.

Cream the butter and the sugar in a bowl with an electric mixer until light and fluffly. Add the eggs, one at a time, mixing well after each addition. Add the vanilla extract and beat again.

Add the sifted ingredients graduatlly in three addition, alternating with the banana and buttermilk and mix until just combined.

Stir in the chocolate and nuts and mix it with a spatula.

Pour the mixture into the loaf tin and level it out with a spatula,

Bake in the center of the oven for 50 minutes, until a skewer inserted into the center of the cake comes out with only few moist crumbs attached. Let cool ten minutes in the tin and then let cool completely on a wire rack.

If your loaf gets darker on top before the inside is done cooking, just cover it with aluminium foil.

You can also use loaf tin paper liners or just a baking paper on the bottom to unmold it better, but with the tin perfectly greased should not be any problem.


Perfect to serve it warm, but also posible to keep in an airthight container at room temperature not more than 3 days.

This is my adaption of a recipe of Primerose Bakery, but I did quite a lot of modifications.

Enjoy your week 


11 October 2012

Parmesan and Sesam Crackers


Who can resist to eat just one cracker? me not. I love them, but I avoid to buy them otherwise I start the whole pack and I can not stop until is completly finished! so when I discovered this recipe I was so happy and I could add any ingredient I wish, also it is a good alternative since the quantity of my recipe is much less than the huge packs you can get in the supermarket, and of course is more healthy.
They are crunchy and cheesy, and delicous with the special taste of the sesam which I love.


INGREDIENTS (makes a full oven tray)

180 g bread flour
30 ml whole milk
80 ml warm water
1 teaspoon virgin oil
35 g grated parmesan cheese
2 teaspoon black sesam
1 teaspoon white sesam
1/2 teaspoon of salt
a pinch of sugar
1 teaspoon instant yeast

Topping: salt, oregano, thyme...

Combine all the ingredients with your mixer in a bowl. Mix with your hands and wrap the dough with plastic, Set aside for an hour.

Preheat the oven to 200º and prepare a tray with a sheet paper.

Divide the dough into 3 parts and roll each into a thin rectangle of 3 mm. 

Cut the dough into squares with a pastry cutter or pizza cutter (mine was 3cm), it is not necessary to leave so much space since they do not grow when you bake them.

Punch the dough using a fork to avoid puffing in the oven, and press down

Sprinkle with salt and herbs.

Bake it for 7 minutes or until crackers get golden, just before the edges get darker.

Turn off the oven and leave the tray in the oven for 30 minutes. The crackers will get crunchy and dry. If you wish you can add now more salt and/or herbs.


This is my adaptation of this recipe.
You can store the crackers up to 5 days in an hermeticalysealed container or in a sealed plastic bag.

Enjoy 

09 October 2012

West Coast Trip

I wanted to tell you a little bit about my trip to the States. I say a little bit because even this large summary I would need even more space to tell you all the amazing things I did and I saw. This is my third time to America, but the first time to the West Coast and even all good things I read and other people told me before, I got impressed about almost everyhting I saw in that awesome part of America.

I do not want to repeat the same pictures and stories you can find on many other blogs and travel guides. But instead I just want to show you some pictures, but it is not as close as being there yourself.

I visited Las Vegas, Los Angeles, San Francisco, Carmel, Monterey, and some other smaller cities, and the best of them all is without a doubt San Francisco, of course. I fell in love with that city, I really could live there right now. Is not a city to walk around in, because it has too much climbs and slopes, so it is quite exhausting to see it walking. But you have the lovely cable car which you should try at least once! also the tram and the bus are good solutions, and somehting I did as well is to cycle along the coast from pier 39 to the famous golden gate and cross the bridge. This is also somehting quite tired, but was amazing cycle over the bridge and to feel the wind and the sound of the many cars passing by. I recommend you as well to visit Alcatraz, watch the seals at the pier 39, there are so much things to do there!


I knew already what people says about LA, so I was not disappoined with that city. I was sleeping in a hotel at Venice Beach and that is one of the best areas to overnight. I recommend you to rent a bike and enjoy the beach, cycle to Santa Monica, walk on the pier, have a nice meal, and you can also do a lot of shopping there. But if your budget is higher then go to Rodeo Drive baby, but this was not my case.


The other part I enjoyed the most were all the national parks, I love them: Death Valley,Yosemite, Mariposa, Zion, Bryce Canyon and Antelope Canyon, I had no more time left to visit more, I would wish to visit more, but that country has too much parks, and three weeks was all my budget. There I could enjoy the nature I did a lot of hiking and I even saw a bear in Yosemite!


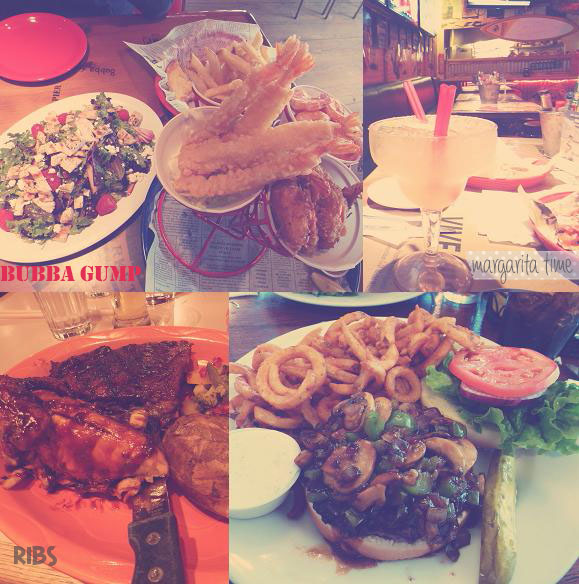
Eating in America is also an adventure, and as a food lover I enjoyed a lot. They really have a large variety of food everywhere, and something I love is to have a box to take the left overs home. All restaurants in Europe should do the same!


Cupcakes at the breakfast buffet of a hotel & Pancakes in a bed&breakfast (actually the best I ever had)
Brunch at IHOP (International House of Pancakes) & American breakfast

Huge hamburgers, I just love them! Nice ribs and the best steaks.


Something I discover in this trip is: The fact that I love Margaritas! I had all type of margaritas, frozen, strawberry, melon... I did not realize I would love something that contains tequila, but now I do!!

I like american supermarkets, they have everything you can imagine and much more, and a large variety of each thing, sometimes this makes me crazy. I like to walk around in them and look at all the products. I have bought some stuff there, such as chocolate and penautbutter chips and more which is less common or more expensive in Europa. The cookies did not survive till the end of the trip, I ate all of them before my departure day, like mint and strawberry oreos, and all kind of chocolate bars...


All kind of cake decorating stuff and fresh cupcakes (I did not try them)

And of course cupcake time! I've visited the two shops that Miette has in San Francisco and Magnolia Backery in LA. Lovely cupcakes and lovely backeries, Magnolia is much bigger than the one I've been to in NY.


I know, my diet was totally out of the window during my holiday... but who cares! This last part looks more like a food diary than a trip story, well my blog is about food so...

There was KitchenAid and Martha Stewart stuff everywhere! I did not buy the mixer but I bought a cute pink set of measuring cups and spoons of KitchenAid :)


I did not buy so much stuff as I did in my other two trips to the US, actually I had not so much time left for shopping, but there is always time to visit a bookshop, and here you can see my new books. Of course the Miette one, after the visit to the backery I get mine. I bought Joy the Baker and Sprinklebakes as well, since I love their blogs. I also had time to visit the lovely shop of Anthropologie, which is amazing, I could only buy a pair of bowls.

That's all, hope you enjoyed and if you have the chance just go and let me know 


04 October 2012

Chocolate Chip Cookies with Speculoos Cream


Here you have my lastest chocolate cookies with a touch of speculoos. I love american style cookies, soft and chewy, and with the taste of speculoos and dark chocolate it makes a great taste combination.

For those who do not know what speculoos is I will tell you it is a spiced cookie, traditionaly from the Netherlands and Belgium, you can get it also as speculoos cream in a jar. I know is not easy to find it in many countries, but it is getting more easier to find it in special shops or big stores. Speculoos taste makes me remember Christmas, since it is typical for the christmas season, but nowadays you can find it the year around, and for me is always nice to enjoy a speculoos cookie or spread this lovely cream on a toast.

If you do not have speculoos cream you can use penaut butter, it taste differet but alos absolutly amazing, I asure you because I tried it as well!


INGREDIENTS makes 12-14 cookies

130 g all purpose flour
125 g light brown sugar caster (or half white half dark)
100 g unsalted butter (soft and cubed)
1 large egg
a pinch of salt
1/2 teaspoon baking soda
1/2 teaspoon vanilla extract
175 g chocolate chips (or crunched chocolate)
50 g speculoos cream

Preheat the oven to 175º and prepare the tray with the baking paper.

Sieve the flour, the salt and the baking soda. Keep aside.

Mix the softened butter and sugar, then break in the egg, add the vanilla extract and mix well with a spatula until well combined.

Add the speculoos cream to the mixture and mix it well with the spatula.

Add the sieved ingredients to the mixture in two batches, mixing gently just until all ingriedients are integrated, do not overbeat.

Mix in the chocolate chips.

Make little balls with two spoons (golf ball size) and place them on the prepared baking sheet. Make sure to space them apart from each other about 8 cm, as they will grow. If you wish you can top them now with some extra chocolate chips before placing them in the oven. Store the rest of the mixture in the fridge during the oven time.

Bake them for 15 minutes or until the cookies get golden, just before the edges get darker.

Leave them on the baking sheets for 5 minutes and after let cool them down on a wire rack.

If you like your cookies a bit soft and chewy take them out of the oven as soon as they start to turn golden.
You can keep the cookies in an hermeticaly sealed jar or box up to 5 days.


Enjoy 


27 September 2012

Oreo Kiwi Tartlets


Summer is completly gone, and you can see everywhere Halloween and even Christmas stuff, some people are crazy! I have to confess you somehting, I love cold weather, otherwise I would not have moved to the Netherlands. My favorite season is Autunm, the colors of the landscapes, the warm clothes, the rain! yes I love the rain! Now it makes me remeber when I was a child and school just started, and days were going shorter and shorter, at that time I hate it, now I enjoy it a lot and cold and rainy days makes me do things  at home which I love such as crochet, painting  and of course baking.


Today I want to show you my last recipe, no baking required for these tartalets, the only thing you will need to do is the pastry cream, which must be preapared in advance, so you can do it the day before, and then you will need to preapare the tins, wait until the crust is ready and fill it with your favorite fruit, in my case kiwis. I keep cheated myself thinking as it contains kiwis I will get less fat, what a dreamer...


INGREDIENTS Serves 4

Vanilla Pastry Cream {recipe of Martha Stewart}
1 cup milk
1/2 tbs vanilla extract or vanilla bean
2 large egg yolks
50 g sugar
15 g cornstarch

Put the milk and vanilla in a saucepan until starts boiling. Remove from heat, cover and let stand for 20 minutes.

Whisk egg yolks until smooth and reserve.

Put sugar and cronstarch in a saucepan and add gradually the milk mixture and cook over medium heat, stirring constantly, until mixture thikens and begins to bubble, about 5 minutes.

Whisking constantly, slowly pour one-third of milk mixture into egg yolks. Pour mixture into remaining milk in saucepan. Cook over medium heat, whisking constantly, until mixture comes to a full boil and is thick enough.

Strain mixture through a fine sieve into a heatproof bowl. Cover with plastic wrap, pressing directly on surface. Refrigerate at least 2 hours or up to 2 days. Before using whisk to soften slightly.

For the crust:
32 oreo cookies, finely chopped
100 g unsalted butter

Chop the cookies in a food processor and mix it with the melted butter.
Line the tart pans with the cookie mixture and store it in the fridge at least 30 minutes or until the mixture has solidified.

Make sure you use tartlet tins which are easy to unmold tart otherwise they could break when you unmold them.

Pour enough pastry cream into each tartalet to fill the shell and top with sliced kiwis.


Enjoy 


17 September 2012

Mango Lassi

Summer is almost gone... and while we are waiting for the Fall I take advantage of the last warm and sunny days preparing refreshing recipes such as this Lassi. As I told you this summer my new blender has become a good friend in the kitchen, also making smoothies and all kind of milkschakes.

         
The first time I hear the word Lassi, it attracted my attention, and when I realized where it was originated even more. This recipe comes from India, and I have to tell you I love that country. I've never been there but is already waiting in my whishing list of trips! I love the music, the movies and of course the food.


Lassi can be sweet or salty, both are very refreshing, has a large range of combination possibilities and used to be flavored with species such as cardamom, ginger, black peper, comin, coriander and many others. Mango lassi is the most common of the fruits lassis, and is really the one I like the most. Mixed with yogurt, milk and water you will enjoy in less of 10 minutes a refreshing famous indian drink. 

The mango is sweet enough so it is not necessary to add sugar, but if you prefer is also common to add some honey spoons or some sugar as well.


There are several versions of Mango Lassi, most of them cointain more yogurt and milk than mango, and I prefer the other way around. I rather have more mango taste and also because of the final result with more mango it get a gorgeous color. After testing some of them this is my version:

INGREDIENTS serves 2

275 g ripe mango cubed
100 g greek yogurt
60 ml milk
1 or 2 cardamom pods (cardamon powder or some other species)
crushed ice cubes
chopped pistachios and cardamon powder for granish

Crush cardamom pods and combine all ingredients less pistachios and ice cubes in a food processor. Blend until smooth. Throw in some ice cubes. Serve and top with some pistachios and cardamon powder.


Enjoy